In this tutorial I’ll show how to install PosgreSQL v10.6 on CentOS 8.
PostgreSQL (also called Postgres) is an advanced and powerful Object-Relational database management system (DBMS), with a strong reputation on enterprise environment, designed for scalability, performance, high availability, reliability and feature robustness. It supports a large part of the SQL standard and offers many modern features:
- complex queries
- foreign keys
- triggers
- updatable views
- transactional integrity
- multiversion concurrency control
- functions
- operators
- aggregate functions
- powerful store procedure engine
- powerful and flexible security scheme
PostgreSQL has 2 main components:
- Postgres server: manage databases, users and replication tasks.
- Postgres shell: is a cli program used to connect to the Postgres server and execute database queries administration tasks.
CentOS is an enterprise ready (robust, secure, reliable and stable) operating system built from the sources provided by a prominent GNU/Linux operating system provider: Red Hat (CentOS is a RHEL rebuild).
Clouding.io is a cloud and VPS service provider with flexible payment system and easy server setup, you can create and manage (expanding, modifying or deleting) your server from an intuitive web interface. Creating a VPS server on Clouding.io takes 5min approximately and the server installation process is done automatically. Clouding.io provides the last version of CentOS, Ubuntu (LTS) and Debian, also you can install prepacked apps like: Mangento, WordPress or Odoo of if you prefer you can install a LAMP/LEMP stack or the docker container with a single click.
So the first step is to create the VPS
Create the VPS on Clouding
You need to create and activate your account on Clouding.io to have access to the Control Panel.
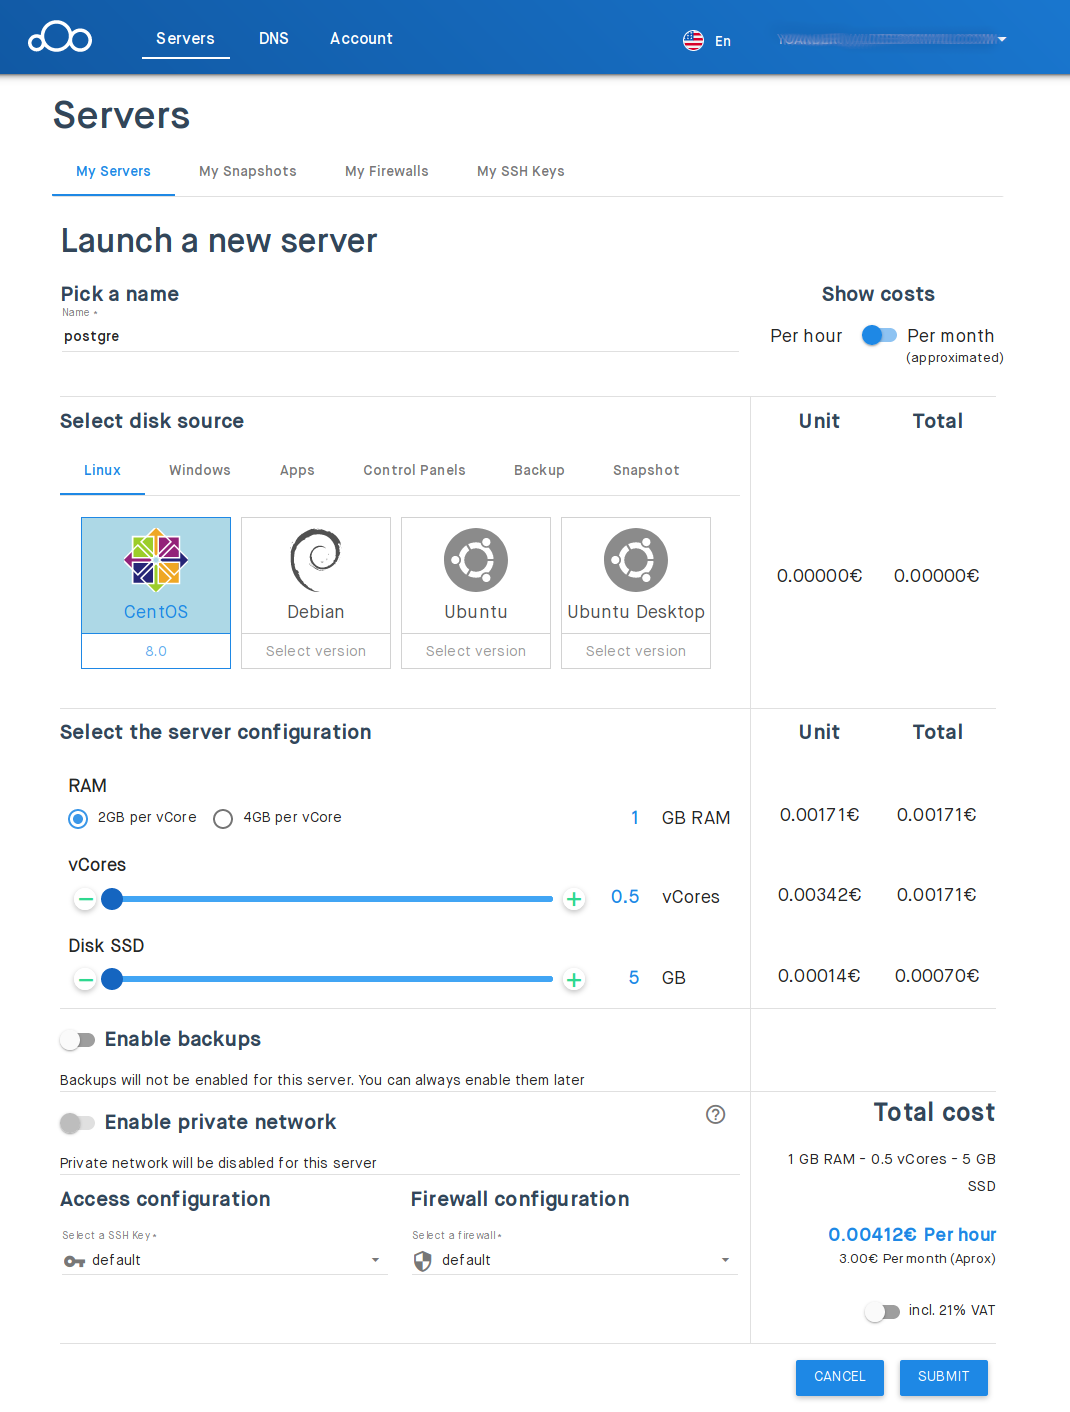
Step 1. Create the Server
Step 2. Configure the server
In this step we can select the GNU/Linux distribution that we want to install: CentOS, Debian or Ubuntu after select one of them, we can select the version that we want, also we can set the the amount of RAM and hard disk size. Please note that default firewall configuration is too open, for example you can reach port 22 from every where so you need to change this behavior from My Firewalls tab.
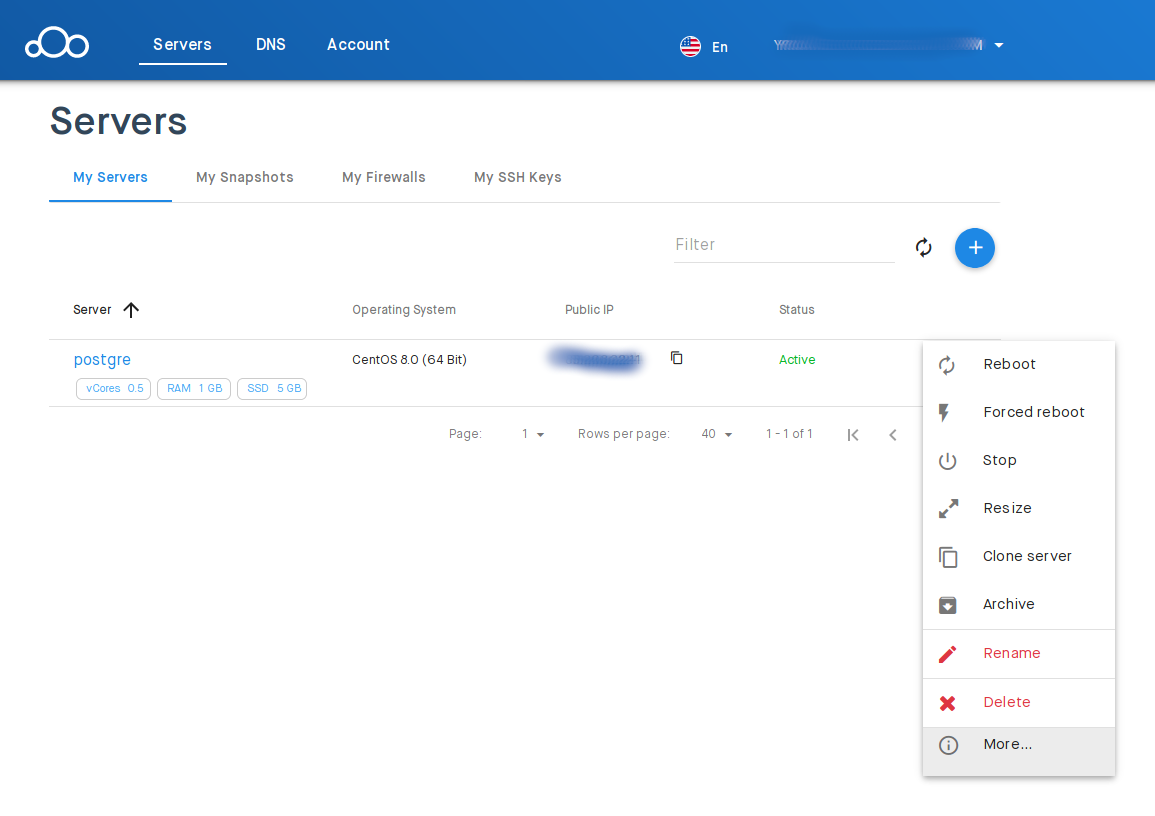
Step 3. Creating and setting the server
This step will be done automatically and take 1 or 2 minutes approximately, so you can take a cup of coffee while the server is setting up :). After the process is completed a notification, about the server is ready to use, is sent to your email.
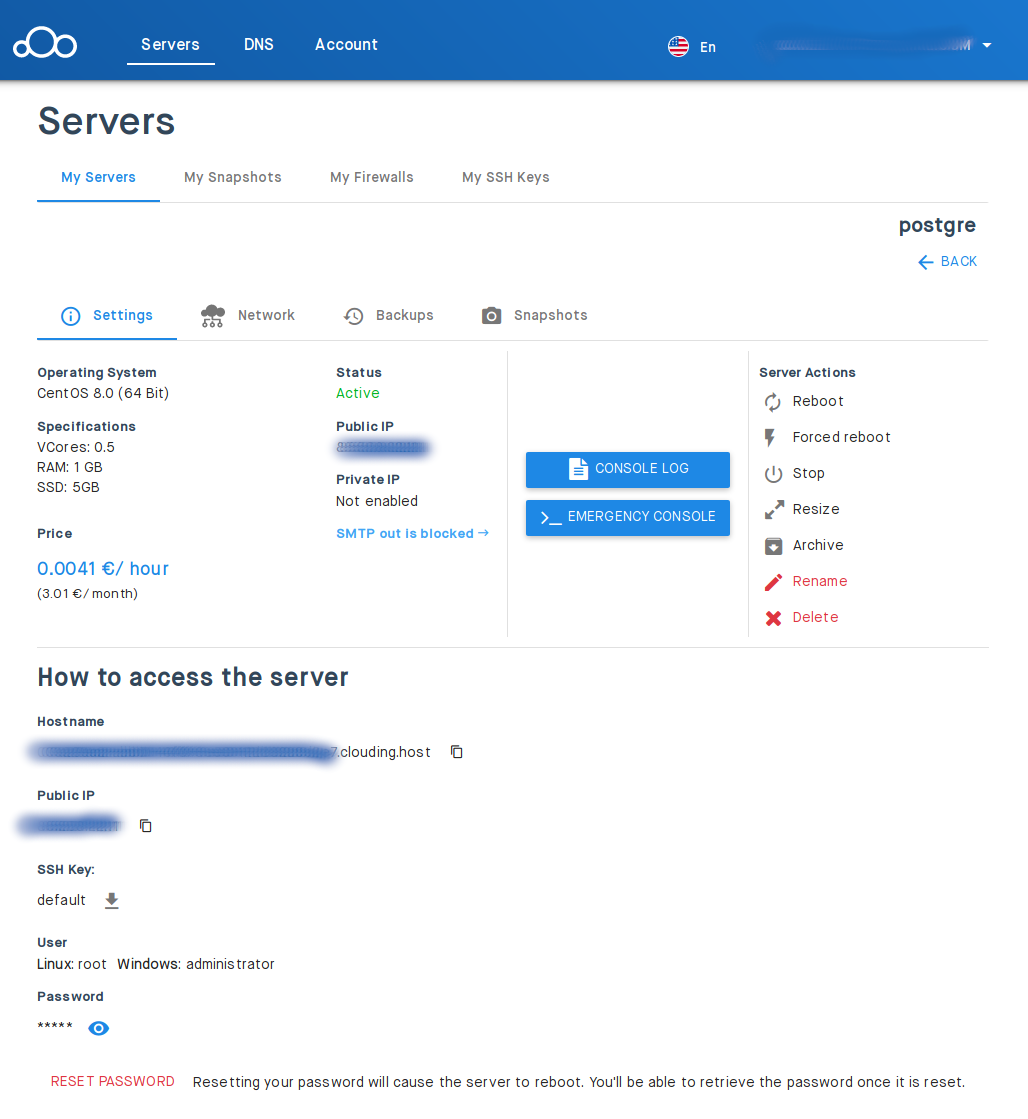
Step 4. Checking the server features
Now you can inspect the server features like: Operating System, cores, RAM, IP, root password and VPS price also you can execute server actions: Reboot, Stop, Resize and more.
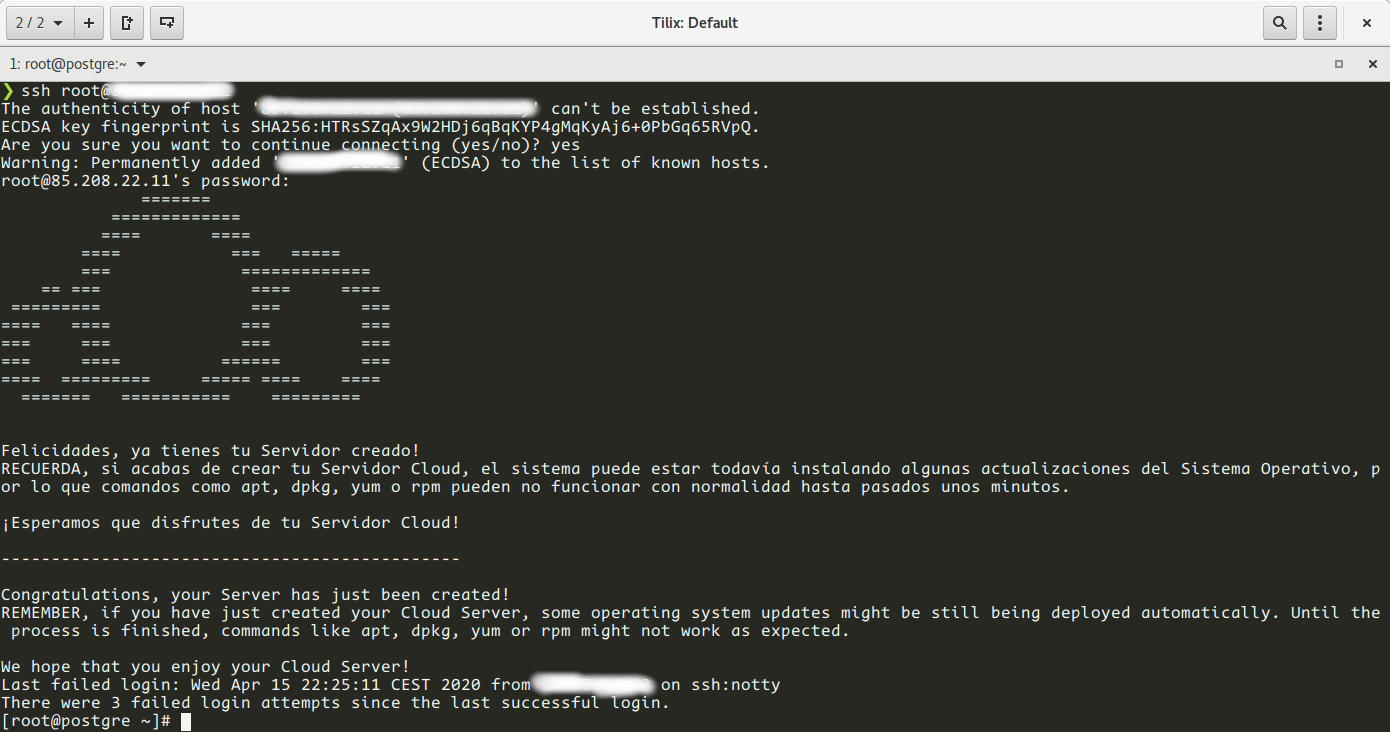
Step 5. Connect to the server
After your server is deployed you are ready to connect to the server via ssh using user and password authentication or using passwordless authentication, in this case you need to download the private key from My SSH Keys and save locally under $HOME/.ssh, select the name that you want, for example clouding.pem and later do:
$ ssh -i .ssh/clouding.pem root@ServerIPthe clouding.pem should have 600 perms, you can set it with:
$ chmod 600 .ssh/clouding.pemInstall PostgreSQL
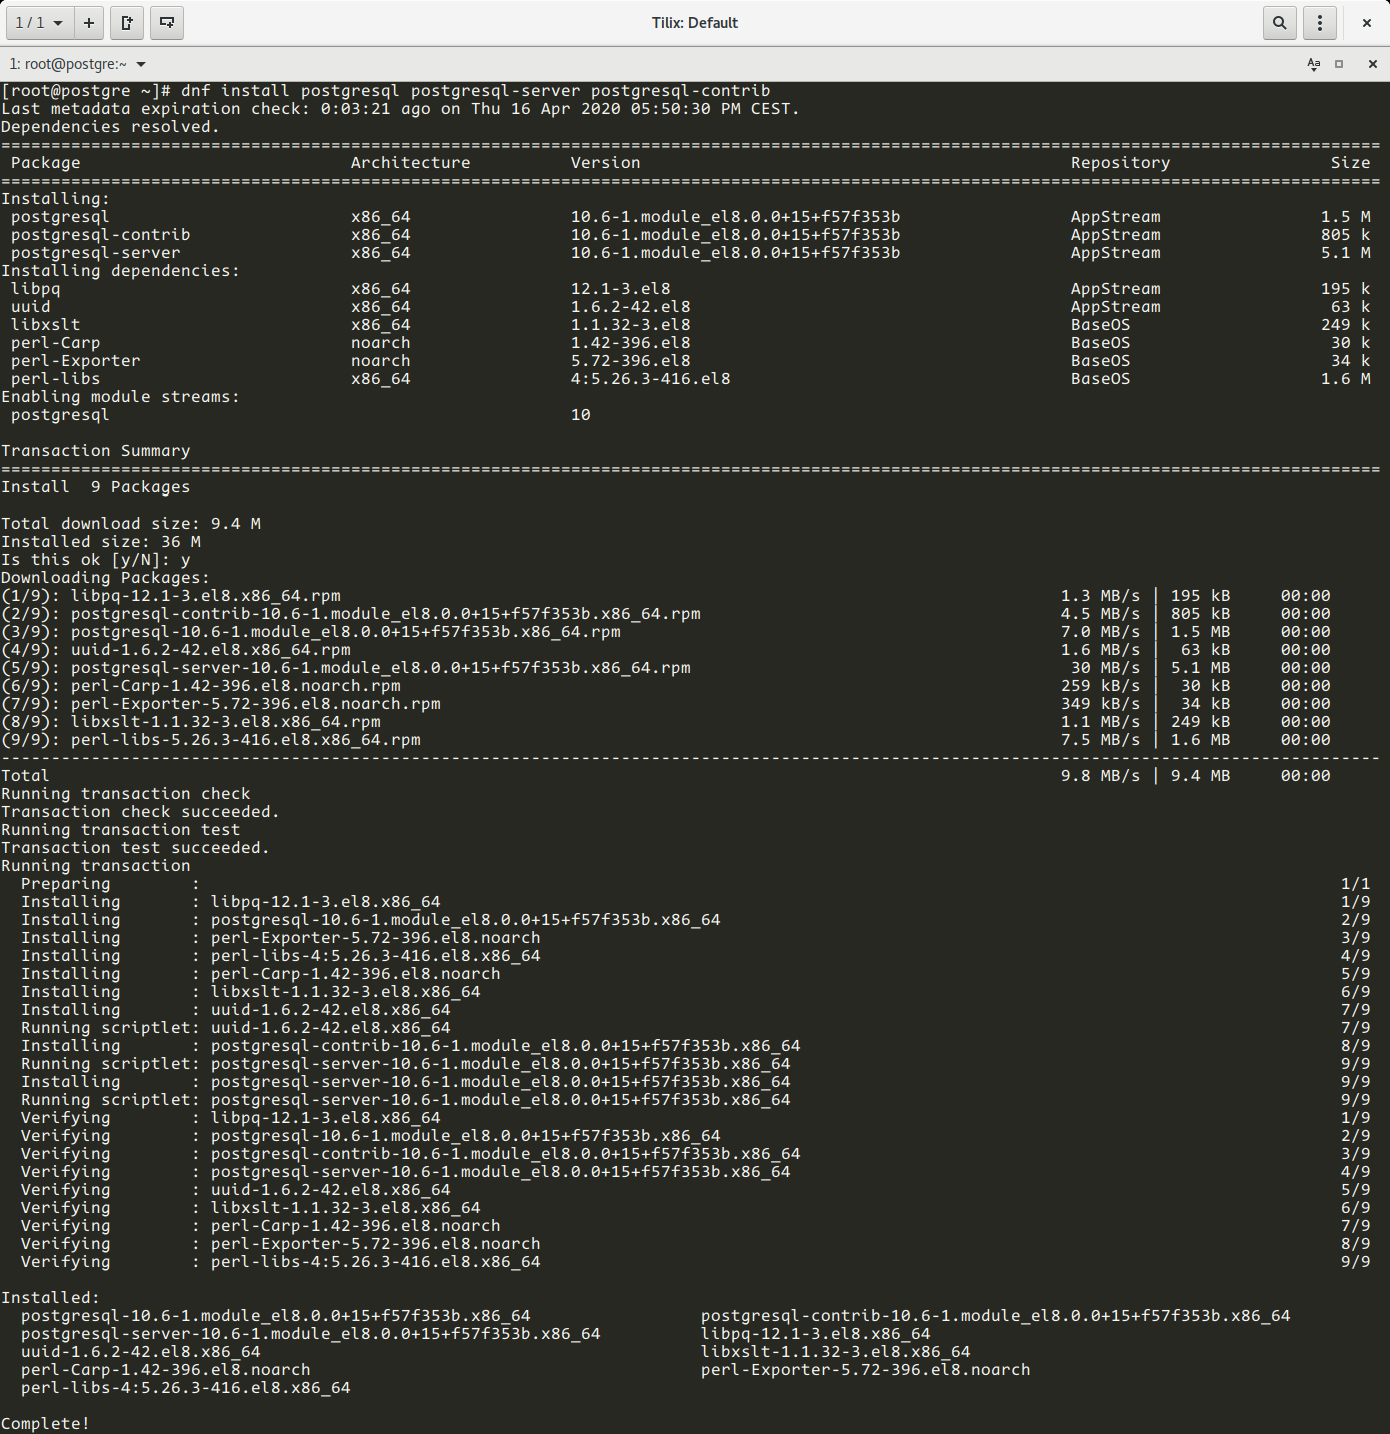
dnf is the default package manager on CentOS 8, dnf allows to install, update and remove package from the base operating system, to install PostgreSQL execute the following command
postgresql contains the client programs that you’ll need to access a PostgreSQL DBMS server, as well as HTML documentation for the whole system.
postgresql-server contains the programs needed to create and run a PostgreSQL server, which will in turn allow you to create and maintain PostgreSQL databases.
postgresql-contrib contains various extension modules that are included in the PostgreSQL distribution.
# dnf install postgresql postgrepsql-server postgresql-contribAs you can see in the above picture we installed PostgreSQL successfully, now we can check where the Postgres files are located executing:
# rpm -ql packagenameWhere packagename is: postgresql, postgrepsql-server, postgresql-contrib
for example Postgres binary files are locate under /usr/bin, Postgres modules under /usr/lib64/pgsql and Postgres database under /var/lib/pgsql
Please note at this time the PostgreSQL server is not ready to use yet, if you execute:
# psql -U postgresYou get an error like this:
psql: could not connect to server: No such file or directory
	Is the server running locally and accepting
	connections on Unix domain socket "/var/run/postgresql/.s.PGSQL.5432"?
In order to fix it you need to:
Create/initialize the cluster:
The following command create the configuration files and data bases required by Postgres server.
# postgresql-setup --initdb --unit postgresql
If you get an error like:
/etc/profile: line 45: /dev/null: Permission denied
you can fix it by
# chmod 666 /dev/nullRemember /dev/null is a special device that discards all data written to it (it is the black hole in the computer world).
Now we’re ready to start using our DB server.
Manage the Server process
In this part we will learn how to start, stop or restart the postgresql service, for this we will use the systemd initialization system (systemd is a replacement for the SysV initialization system also a configuration and service management suite for the GNU/Linux operating system).
Start the server
# systemctl start postgresqlCheck the status
With this command we get information about PostgreSQL service
# systemctl status postgresql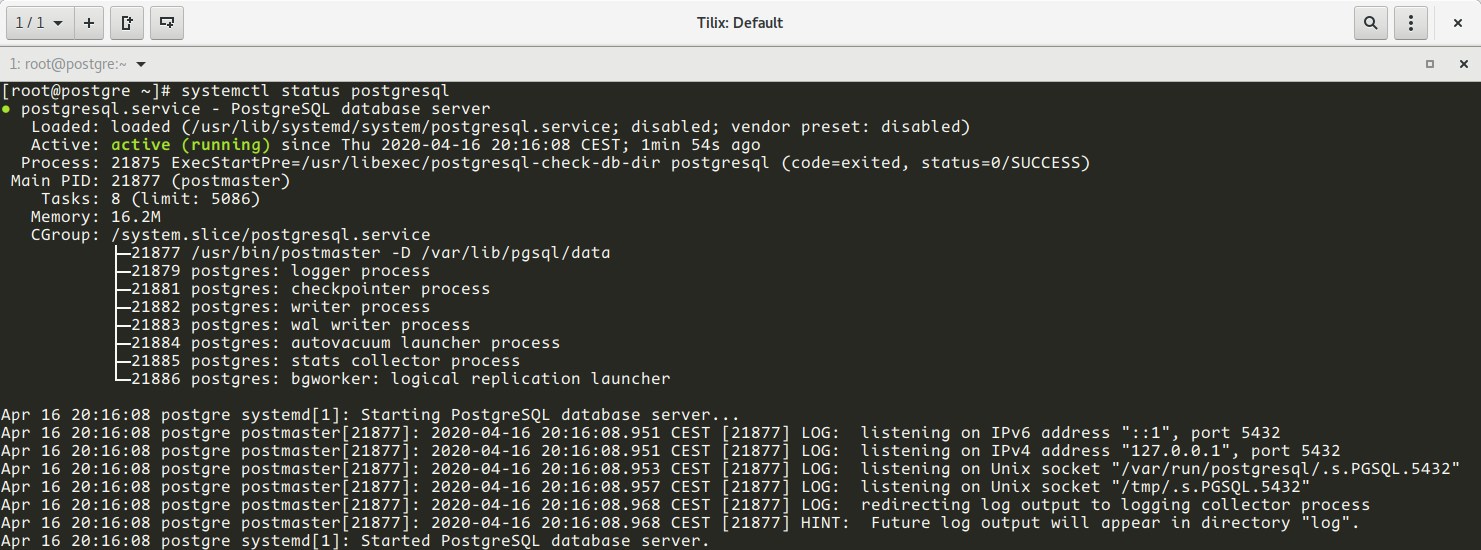
As you can note in the above picture the PostgreSQL server is running successfully.
Restart the server
# systemctl restart postgresqlStop the server
As needed, you can stop the Postgres process by issuing the following command:
# systemctl stop postgresqlVerify that the server starts with the Operating System
# sudo systemctl is-enabled postgresql
disabled means that it does not starts with the Operating System.
Start the service with the Operating System
You can ensure that PostgreSQL will start following a system reboot by issuing the following command:
# systemctl enable postgresql
If you want to revert this behavior execute:
# systemctl disable postgresql
Connect to the server
psql is a CLI client for Postgres administration, psql allows:
- Connect to the server
- Create DB
- Admin users
- Execute SQL queries and perform administration tasks in general.
Before connecting to the server is a worth to note that:
- PostgreSQL manages database access permissions using the concept of roles. A role can be thought of as either a database user, or a group of database users, depending on how the role is set up. Roles can own database objects (for example, tables and functions) and can assign privileges on those objects to other roles to control who has access to which objects.
- The installation procedure created a user account called postgres (this user has all privileges over the PostgreSQL server like root user on MySQL) that is associated with the default Postgres role. In order to use Postgres, you can log in to that account.
# su - postgres -c psql
As you can see in the above picture we are connected to the PostgreSQL, issue the help command to start using the PostgreSQL shell.
if you are using sudo you can connect to the PostgreSQL issuing:
$ sudo -u postgres psqlAfter connecting to the Postgres server you can
Create a new user
postgres=# CREATE USER username WITH PASSWORD 'MYPASS';for example:
postgres=# CREATE USER dbadmin WITH PASSWORD 'MyDBPass12';
The above password is weak don’t use it on production environment.
Create a new database
postgres=# CREATE DATABASE dbname OWNER username;for example:
postgres=# CREATE DATABASE mydb OWNER dbadmin;
Enable remote access to PostgreSQL server
For connecting from a remote device you need to modify the /var/lib/pgsql/data/postgresql.conf and /var/lib/pgsql/data/pg_hba.conf files. Look for listen_address in postgresql.conf, uncomment it and add the IP addresses where the Postgres server is listen on, for example:
listen_addresses = 'localhost, YourServerIP'
Look for IPv4 local connections section in archivo pg_hba.conf and add your remote device IP
host all all RemoteDeviceIP/32 md5
Restart your DB sever and add a firewall rule like this

Note that the Source IP is too open, so you must restrict the IP to your remote device.
Now you can connect to the PostgreSQL server from a remote device:
$ psql -U dbadmin -h RemoteIPServer -d mydb
Conclusion
You are now set up with PostgreSQL on your CentOS 8 server. However, there is still much more to learn with Postgres so a good place to start is the official project site.
Spanish Video


