Node.js is an event-driven and asynchronous Javascript runtime environment designed to build network applications and to run server-side Javascript applications allowing you to build applications using a single programming language.
npm is a package and dependency manager for Node.js
Today we will learn how to install Node.js and npm on Debian, Ubuntu, CentOS and on any GNU/Linux distro.
Install
Debian
$ sudo apt install nodejs npm
Verify node version
$ node -v
v10.23.1
Verify npm version
$ npm -v
5.8.0
Ubuntu
$ sudo apt install nodejs npm
Verify node version
$ node -v
v10.19.0
Verify npm version
$ npm -v
6.14.4
CentOS 8
$ sudo dnf install nodejs
Verify node version
$ node -v
v10.21.0
Verify npm version
$ npm -v
6.14.4
Takes my attention the notable difference between the npm versions of Debian and Ubuntu, in the case of Node.js Debian is slightly more updated, all previous distros use the LTS version of node.
The above procedure ran on Debian 10, Ubuntu 20.04 and CentOS 8 but it is similar for other versions of these distros it would only change the installed version of node and npm.
The advantage of using the official repositories is that you can install updates automatically with a:
$ sudo apt update
$ sudo apt upgrade
o
$ sudo yum update
according to the case.
Using pre-built installer
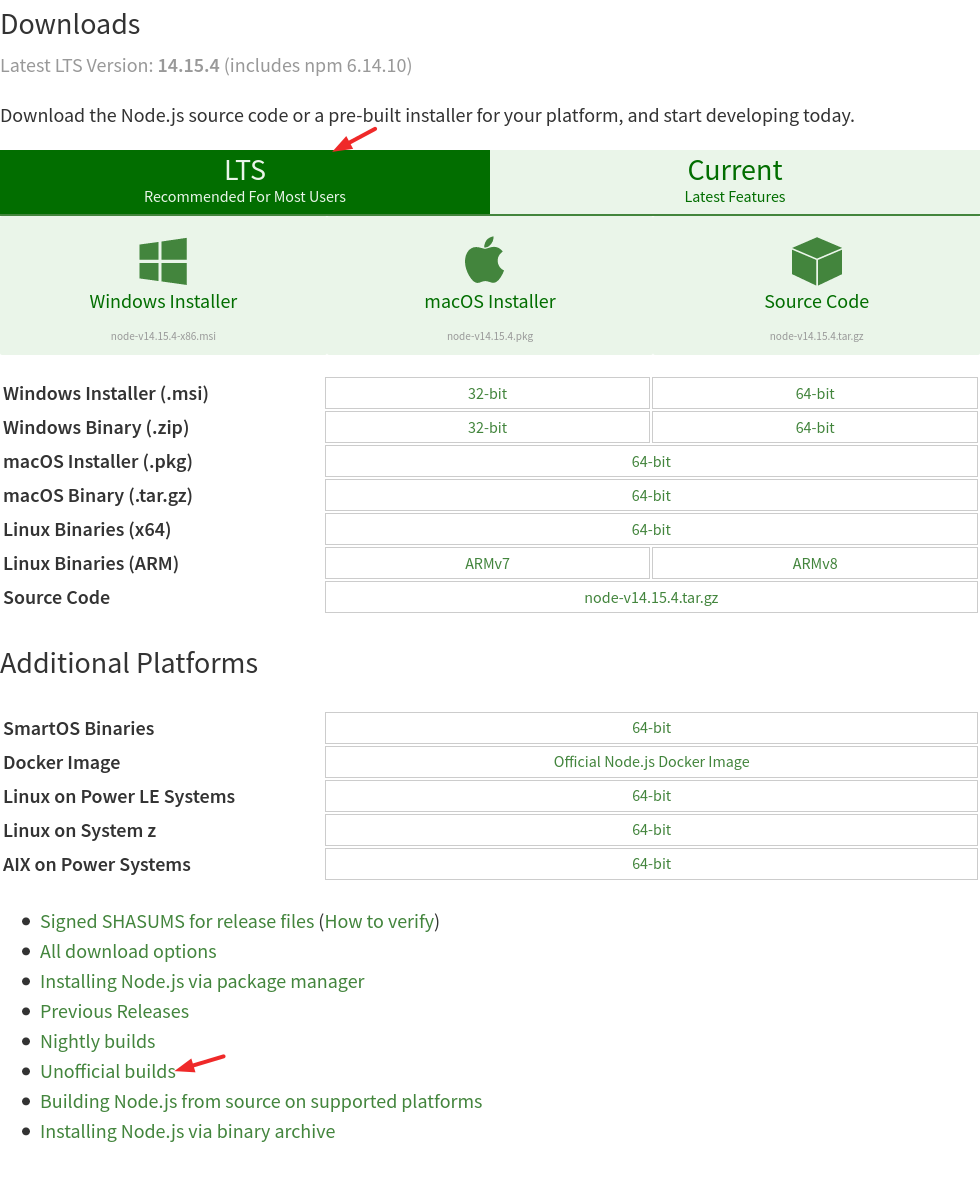
The disadvantage is that the previous distro do not include the latest version of node LTS in their official repositories, so we can download the binary from the official site: https://nodejs.org/en/download/ and select the platform on which we are going to install node. For distros that do not use glibc you must download the unofficial binaries:

We will use Alpine a minimalist distribution with a focus on security and simplicity, to install the binary, it is advisable to use a standard user for this purpose, in case it does not exist we can create it running:
adduser nodejs
Note that Alpine uses BusyBox and the above command differs from the add user command in other distro like Ubuntu, Debian.
Crate the .local dir if does not exists
$ mkdir .local
Download the pre-built binary
Alpine uses musl as a base library for its ecosystem while the official Node binaries use glibc therefore you have to use non-official binaries but this does not represent any risk because they are recommended by the Node project, https://nodejs.org/en/download/
$ wget https://unofficial-builds.nodejs.org/download/release/v14.15.4/node-v14.15.4-linux-x64-musl.tar.xz
Extract
$ tar xJvf node-v14.15.4-linux-x64-musl.tar.xz -C .local/ --strip-components=1
- x: Extract
- J: Filter the archive through xz
- v: Verbose
- f: Use archive file or device
- -C: Change to .local DIR before performing any operations
- –strip-components: Strip NUMBER leading components from file names on extraction in the above command delete
node-v14.15.4-linux-x64from the files name.
the .local directory structure should be similar to:
.local/
├── bin
├── include
├── lib
└── share
Agregar el .local/bin al PATH
Create the .profile file.
If the file does not exist create it, with this command:
$ touch .profile
Add these lines to the .profile file
PATH=$PATH:$HOME/.local/bin
export PATH
Do logout/login in order to refresh the PATH environment variable.
Verify node version
$ node -v
v14.15.4
Verify npm version
$ npm -v
6.14.10
Sample app
We can test the previously described methods by creating a simple app, we will use the code that we can find at https://nodejs.org/en/about/
const http = require('http');

const hostname = '127.0.0.1';
const port = 3000;

const server = http.createServer((req, res) => {
  res.statusCode = 200;
  res.setHeader('Content-Type', 'text/plain');
  res.end('Hello World');
});

server.listen(port, hostname, () => {
  console.log(`Server running at http://${hostname}:${port}/`);
});
Save the above code in app.js file and execute:
$ node app.js
Another option is using Docker
Using Docker
Docker provides the ability to package and run an application in a loosely isolated environment called a container. The isolation and security allow you to run many containers simultaneously on a given host.
Before using docker we need to install it.
Install Docker
$ sudo apt install docker
Add the user to docker group
Only add trusted users to the docker group, since this group has administration permissions over the docker service and the docker service starts with root privileges then an untrusted user can escalate privileges by doing a Docker daemon attack surface.
$ sudo usermod -a -G docker $USER
Do logout/login in order to refresh the user groups.
Create the app.js file
Note that the value of hostname has been modified, this is because the app runs inside the container and therefore127.0.0.1 refers to the loopback address of the container and it would not be accessible from outside, so it has been changed to 0.0.0.0 which means all available network interfaces.
const http = require('http');

const hostname = '0.0.0.0';
const port = 3000;

const server = http.createServer((req, res) => {
  res.statusCode = 200;
  res.setHeader('Content-Type', 'text/plain');
  res.end('Hello World');
});

server.listen(port, hostname, () => {
  console.log(`Server running at http://${hostname}:${port}/`);
});
Create and run the container
With the following command we create the minode-app container from the official Node.js image, node version 14.15.4 (LTS) that will run in the background and receive requests on port 3000. The run commands allows to execute node /usr/src/app/app.js inside the container.
$ docker run -d --name minode-app -v $PWD:/usr/src/app -p 3000:3000 node:14.15.4 node /usr/src/app/app.js
Options:
- -d: background.
- –name: Name of the container.
- -v: Mount the current DIR on container /usr/src/app DIR.
- -p: Map host port to container port.
For any of the above method you can put in your browser http://IP:3000 and get the following message:
Hello World
You can find out your IP address typing:
$ ip -4 a
References
Spanish video


